REVIEW · GHENT
Private Historical Tour: The Best of Ghent
Book on Viator →Operated by Gent Free Walking Tour · Bookable on Viator
Ghent becomes crystal clear in just two hours. This private historical walk is built around the city’s medieval power: where Ghent traded, argued, built, and punished, with stories tied to the skyline and the squares you’ll actually stand in.
I like two things a lot here. First, you get a local, professional guide who turns famous landmarks into a connected story (and the guides are often praised for being funny, engaging, and quick to answer questions—names you may hear include Kenny, Sophia, Camila, Hans, Maria, Arn, Julien, Onur, and Kasia). Second, the route hits the big “why Ghent looks like this” spots without turning it into a sprint.
One consideration: the stops are listed as admission ticket free, so you’ll mostly be looking at buildings from outside while learning what’s behind them. If you want to go inside major sites yourself, you should plan on separate tickets and time.
In This Review
- Key things that make this tour worth your time
- A two-hour private walk that makes medieval Ghent click
- St Michael’s Bridge: the start point with skyline and trade context
- Graslei and Korenlei: the medieval port that shaped the waterfront
- Design Museum symbolism and the stubborn mindset of Gentenaars
- Het Groot Vleeshuis: Butchers’ Hall and the darker side of prosperity
- Gravensteen and St Veerleplein: a preserved castle in the city center
- Huis van Alijn, Vrijdagmarkt, and Werregarenstraat: care, contracts, and street art rules
- Ghent Town Hall (Stadhuis): why the façade looks like it does
- St. Bavo’s Cathedral: the Van Eyck anchor point
- Het Belfort van Gent: the people’s tower and prison legend
- Esglesia de Sant Nicolau: St Nicholas and the merchant-sailor link
- Price and value: what you really pay for at $105.82 per person
- What to do before and after the 2-hour walk
- Who this tour suits best
- Should you book the Best of Ghent private historical tour?
- FAQ
- How long is the Best of Ghent private historical tour?
- Where does the tour start and end?
- Is this tour private?
- What language is the tour offered in?
- Is food or drink included?
- Can I cancel for a full refund?
Key things that make this tour worth your time
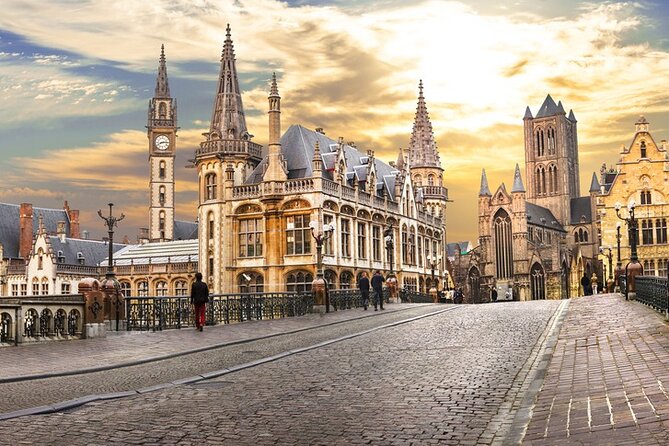
- Private group experience: only your group joins, so questions and pace stay yours.
- Trade-focused route: you connect bridges, canals, markets, and halls to Ghent’s medieval money machine.
- Lots of storytelling per minute: even short stops explain the “why,” not just the “what.”
- A finish at the Belfry: you end at the people’s tower, with the city’s power story wrapped up.
- English available (plus other languages): helpful if your group has mixed comfort levels.
- Most stops are exterior: you save time on entrances, but you don’t automatically get museum access.
A two-hour private walk that makes medieval Ghent click
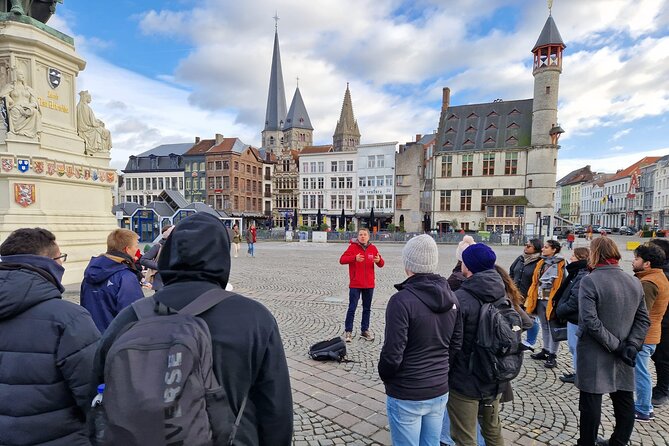
Ghent can feel like a picture postcard—until you understand what you’re actually looking at. This tour is designed to give you that quick cause-and-effect map: trade routes shaped the canals and streets, politics shaped the buildings, and the city’s stubborn independence shows up in towers, squares, and even church façades.
I like that the pace stays human. Each stop is short, so you keep moving, but you’re not stuck listening for a long stretch. You also get that “small-group advantage” in a private setting: if you want more detail on the Counts’ castle or the bumpy political story behind the Town Hall, you can ask and get a direct answer.
St Michael’s Bridge: the start point with skyline and trade context
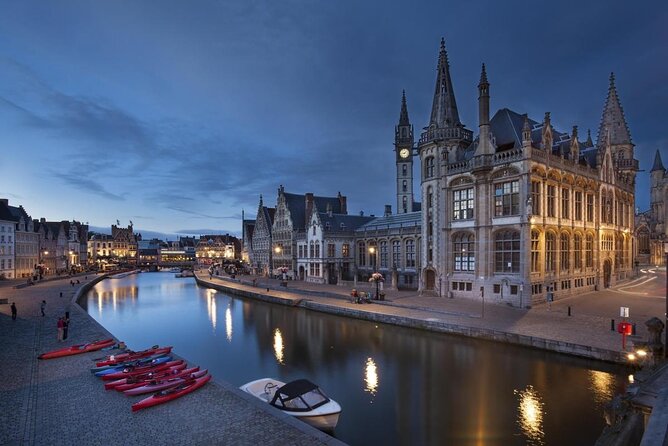
You begin at St Michael’s Bridge, and that’s a smart choice. From here, the guide sets the big frame: Ghent as a medieval trading hub, and how the city’s role in commerce made its power visible.
This is also where you learn about the three towers that dominate the Ghent skyline from this spot. It’s a simple trick, but it changes how you see the city for the rest of the walk—suddenly the towers aren’t random landmarks. They’re part of the same story about wealth, authority, and civic pride.
Time check: you spend about 15 minutes here. That’s just enough to get your bearings and start noticing details, not enough to make the tour feel lecture-heavy.
Graslei and Korenlei: the medieval port that shaped the waterfront
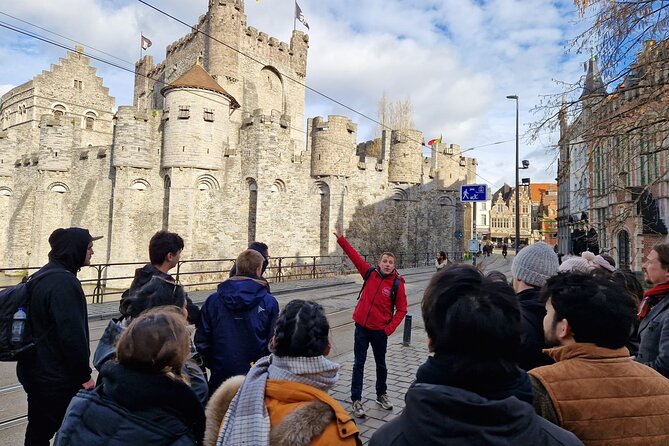
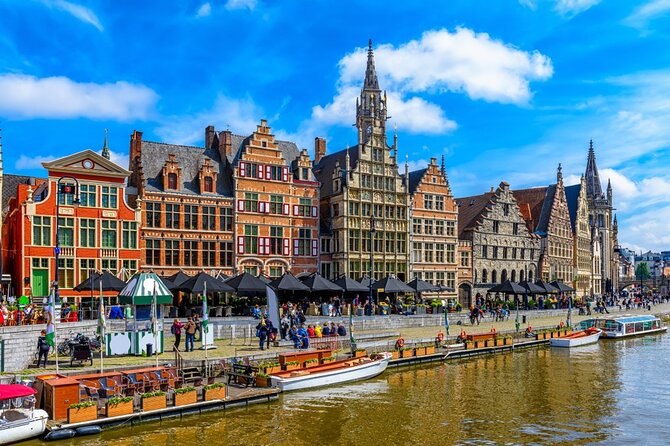
Next you move to Graslei and Korenlei—usually the heart of Ghent’s historical center. This is where the tour connects canals to everyday power. Your guide points out which buildings belonged to trading and port activity when this area functioned as Ghent’s maritime face.
The best part is how quickly you start recognizing structure and purpose. You’ll likely look at façades differently once you know what kind of business they hosted. Even if you’ve seen photos of Graslei and Korenlei, being told the “who did what” makes the place feel real.
This stop is about 10 minutes, so it works as a focused segment rather than a wandering break.
Design Museum symbolism and the stubborn mindset of Gentenaars
There’s a short stop linked to the Design Museum, and it’s there for a reason: it symbolizes the stubborn, rebellious mindset people associate with the people of Ghent. It’s one of those moments where you learn to read attitude in art and architecture instead of treating the city as only postcard beauty.
If your group likes meaning behind details, this is a highlight. If you prefer pure sightseeing with minimal interpretation, it may feel brief, but it adds a needed character layer to the rest of the tour.
Het Groot Vleeshuis: Butchers’ Hall and the darker side of prosperity
Then you cross into the story of Het Groot Vleeshuis, the Great Butchers’ Hall. From the water, you get a strong view of this medieval building, and the guide uses it to share darker facts—an important balance when talking about medieval wealth.
This is one of those stops where the tour nudges you to think beyond the romantic version of history. Where there’s money, there’s also control, labor, and harsh realities. The building’s grandeur makes the “darker facts” more striking, because it forces a second look.
You’ll likely spend around 10 minutes here, keeping the tone varied without dragging the pace.
Gravensteen and St Veerleplein: a preserved castle in the city center
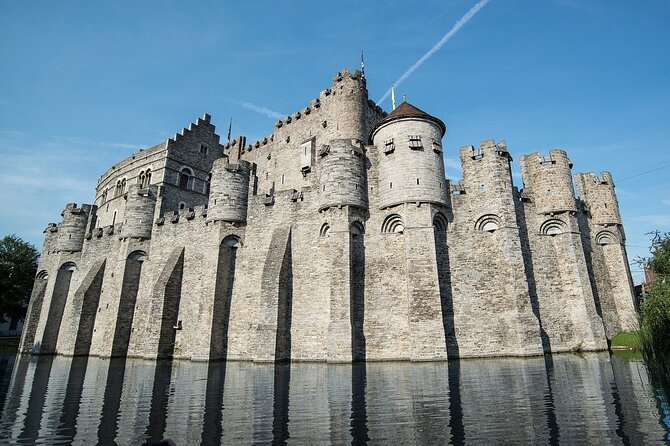
Next comes Gravensteen, the Castle of the Counts. What makes this stop special is location: unlike many castles that sit far out in the countryside, this one sits right in the middle of the city—and it’s described as very well preserved.
Your guide explains its past and why its position mattered. In practical terms, it’s also a great “anchor” moment in the tour: after canals, halls, and markets, you finally get a big defensive symbol you can tie to who controlled Ghent and how.
About 10 minutes at Gravensteen keeps things moving.
From there, you go to St. Veerleplein, where the square is known as the square of death and the square of life. That’s not just wordplay. It points you toward how a single urban space could carry different meanings depending on the city’s power struggles and public rituals.
Huis van Alijn, Vrijdagmarkt, and Werregarenstraat: care, contracts, and street art rules
The tour then shifts from power and punishment to social life and public space.
At Huis van Alijn, you learn that it used to function as a hospital, and it’s noted as the only remaining ‘god house’ in Ghent. That detail gives you a different lens on medieval institutions—helping you see charity and religious care as part of how the city organized life, not just how it fought for control.
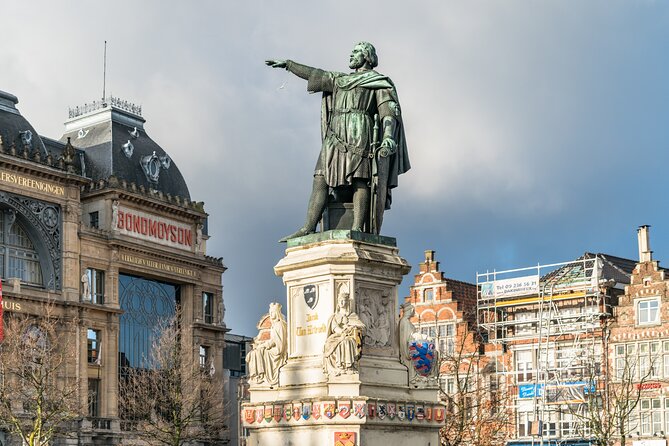
Then you head to Vrijdagmarkt, a prominent square with a statue in the middle. The guide explains the square’s historical role and the story tied to the person represented by the statue. Even if you don’t know the figure already, you’ll come away with a clearer sense of what the square was for and why it stayed important.
Finally, Werregarenstraat brings you to a modern twist: to protect monumental buildings from graffiti, the city designates an area for street artists to work. This part is surprisingly useful, because it helps you understand what you’re seeing today and why it doesn’t always match the gentler “museum city” image.
Each of these stops is about 10 minutes, so you get variety without losing the thread.
Ghent Town Hall (Stadhuis): why the façade looks like it does
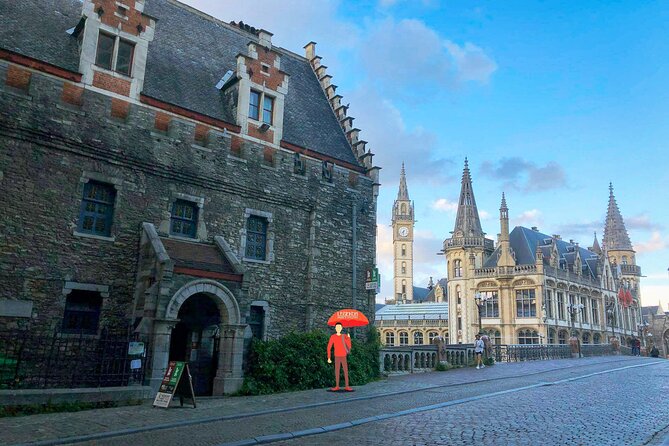
Ghent’s Town Hall (Stadhuis) gets its own quick stop, about 5 minutes, but it’s a memorable one if the guide is good. The point here is that the city hall can look a little confused, and your guide explains why—tying the architecture to the most significant conflict in Ghent’s history.
This is the kind of stop that rewards attention. If you’ve ever wondered why certain older buildings look patched together or intentionally inconsistent, this is where you get the story that makes it logical.
St. Bavo’s Cathedral: the Van Eyck anchor point
St. Bavo’s Cathedral is next, and it’s hard not to get interested once you hear what’s inside and why people travel to Ghent. The tour connects the cathedral’s rich story to its art treasures, especially the world-famous Ghent Altarpiece by the brothers Van Eyck.
Even if you’re not going inside on this tour, you’ll get context that makes the cathedral feel less like a stop you rush past. It becomes a piece of the bigger narrative about why Ghent mattered beyond trade—how the city produced lasting cultural power.
This stop is about 10 minutes.
Het Belfort van Gent: the people’s tower and prison legend
At the Belfry, the tone shifts toward civic identity. The Belfort is described as the people’s tower, reflecting stubbornness, power, and independence. There’s also the detail that it used to be a prison, and the façade tells the story of a bizarre legend your guide shares.
That combination is why this ending works. You’ve spent the walk learning about trade, control, punishment, and public life—and now you land on a symbol designed to show the city’s strength and its sense of self.
You’ll finish the tour in front of the Belfry, on Sint-Baafsplein.
Esglesia de Sant Nicolau: St Nicholas and the merchant-sailor link
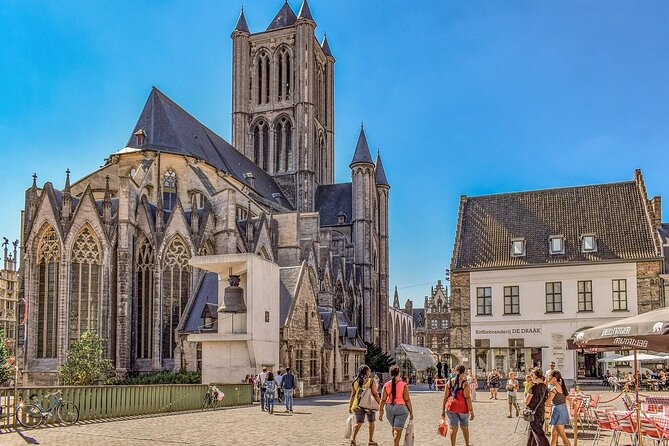
The final stop before the end is the early 12th-century Esglesia de Sant Nicolau, with a view over Korenmarkt. This church is tied to St Nicholas, protector of merchants and sailors—perfect thematic alignment with everything you’ve been learning about Ghent’s trading life.
Your guide uses the façade to explain the legend connected to the saint. It’s a strong way to end: a religious story that fits the city’s working identity.
Time here is about 10 minutes.
Price and value: what you really pay for at $105.82 per person
At $105.82 per person for roughly 2 hours, the value comes from focus and delivery, not from included museum tickets. The price includes all fees and taxes, a local guide plus a professional guide, hotel pickup and drop-off (as offered), and the private format.
So ask yourself what you want most out of Ghent. If you want an efficient overview—where to look, what to notice, and how everything connects—this can be good value because you’re buying someone’s time and story structure.
If you’re the type who loves going inside places and spending long stretches in museums, you may feel the cost more sharply. One guest did flag that the tour mainly looks at buildings rather than entering them, and you might want to plan for extra admissions if your priority is interior access.
What to do before and after the 2-hour walk
Because the tour is tightly timed, you can use it as your planning tool.
Before you go, wear good walking shoes and expect a steady pace through the historic core. You’ll get more out of the tour if you’re not thinking about where you’ll have to return later to understand the layout.
After you finish at the Belfry, you’ll be in the right area to keep exploring on your own. If you want to go deeper into the Van Eyck connection, you’ll know what to look for next. Guides on this route also tend to offer practical food and local pointers, including restaurant suggestions that have made people’s days in Ghent.
A few guests also mentioned fun extras like quick knowledge challenges, and there’s even mention of waffle testing in at least one experience. That’s not something I’d count on as a formal inclusion, but it fits the overall vibe you want: learning without feeling like a classroom.
Who this tour suits best
This works especially well if:
- you have only a short window in Ghent and want the big story fast
- you prefer private Q&A over group logistics
- you like medieval themes: canals, trade, civic power, and the people behind the buildings
- your group values local perspective, including humor and small anecdotes from guides
It may be less ideal if:
- you want mostly indoor museum time with included admissions
- you dislike walking (even though the pace is described as modest by some guests)
One more practical note: the tour is offered in multiple languages with English available, and it’s listed as near public transportation. Service animals are allowed, and most travelers can participate.
Should you book the Best of Ghent private historical tour?
I’d book it if you want a clear, story-led introduction to Ghent’s medieval core—and you’re happy to learn primarily from the outside while saving indoor ticket time for later. The private format is the key advantage, and the route choices (Bridge to Graslei/Korenlei to castle to Belfry) do a good job of teaching you how Ghent’s trading past turned into the city you see today.
If your idea of value is long museum visits with included entry fees, then look closer at what you want to see inside before committing. But for most first-timers, this is a smart way to get your bearings and understand why the city’s landmarks matter.
FAQ
How long is the Best of Ghent private historical tour?
It lasts about 2 hours.
Where does the tour start and end?
It starts at Hostel Uppelink, Sint-Michielsplein 21, 9000 Gent, Belgium and ends in front of the Belfry of Ghent (Belfort van Gent) on Sint-Baafsplein, 9000 Gent, Belgium.
Is this tour private?
Yes. It’s a private tour, and only your group participates.
What language is the tour offered in?
English is offered, and the experience is described as available in multiple languages.
Is food or drink included?
Food and drinks are not included, unless specifically mentioned.
Can I cancel for a full refund?
Yes. You can cancel up to 24 hours in advance for a full refund. If you cancel less than 24 hours before the start time, the amount paid isn’t refunded.