Bruges can feel like a postcard. This tour turns it into a story you can taste. You get a history-first walk that moves quickly between the city’s key squares and churches, and the food stops are planned so you’re not just eating, you’re sampling local habits. I especially liked the way the guide threads the Middle Ages through the streets and then lands you at the places where Bruges still shows its “how life worked” side.
The second thing I really liked: the tastings are the reason you’ll remember the day. You’ll pair classic flavors with short, smart sight stops, and that works well in Bruges, where everything is walkable but time disappears fast. A beer stop with sausage, Bruges-style fries, and chocolate tastings are built in, and you’ll likely pick up recommendations that make your own evening plans easier.
One consideration: this is a fast-moving route. Some stops are only 5 to 15 minutes, so if you want to linger in a church or take an unhurried look at every corner, you might feel a little rushed.
In This Review
- Key Highlights Worth Building Your Day Around
- How the 4-Hour Bruges Route Fits Food, Squares, and Churches
- Start at Markt 5 and Get Your Bearings at Belfort
- Jan Van Eyckplein and the Art of Noticing Old Bruges
- Sint-Annakerk and Adornes Domain: Quiet Stops With Big Neighborhood Clues
- Burg Square and Stadhuis: Where Power Gets Painted Into Stone
- Vismarkt and Dijver: Seeing How Daily Life Fits the Canal City
- The Belleman Pub: Beer and Sausage as a Real Bruges Moment
- Onze-Lieve-Vrouwekerk and Gruuthusemuseum: A Church-and-Family Story
- Chez Vincent Fries and a Chocolate Finish You’ll Plan Around
- What Makes This Tour Work: Fast History, Focused Tastes, Good Flow
- Small Tradeoffs to Keep in Mind
- Should You Book Bruges Food and History?
- FAQ
- How long is the Bruges Food and History Tour?
- What language is the tour offered in?
- Is admission included for the stops?
- What food and drink is included?
- Where does the tour start?
- Is this a private tour?
- What is the weather requirement and what if it’s bad?
Key Highlights Worth Building Your Day Around
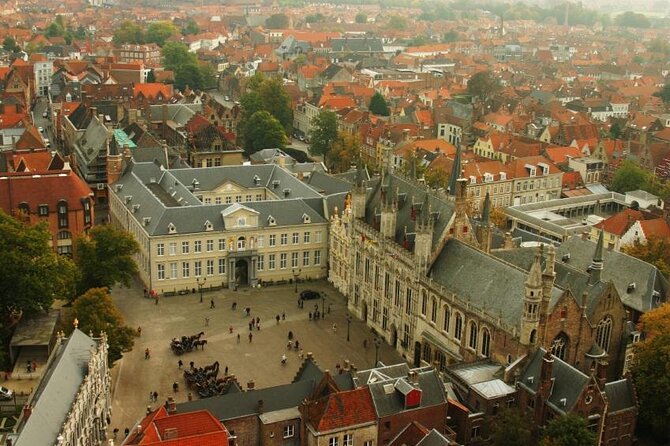
- Belfort and the Market Square: start with Bruges’ civic heartbeat and a quick sense of power, trade, and pride.
- Church circuit with local neighborhoods: you see more than doors and stained glass; you learn how the city shaped around them.
- Canal and harbor-life viewpoints: the walk includes the Dijver area, where Bruges’ waterways make sense.
- Included beer-and-sausage stop: a practical, local break that keeps the tour from feeling like all talking.
- Fries plus two chocolate moments: you get a proper chocolate shop visit and a tasting, not just a souvenir stop.
How the 4-Hour Bruges Route Fits Food, Squares, and Churches
This is a compact walk designed for people who want to understand Bruges without spending an entire day building an itinerary from scratch. The total time is about 4 hours, with lots of short stops that keep you moving, snapping photos, and then resetting over food.
The structure is smart. You start in the big civic area, then work through churches and historic landmarks, then shift toward daily-life spots and canals, and finish with classic Bruges comfort food and sweets. It’s the kind of pacing that works if you’re also doing other things in Bruges later, like a casual dinner or a second stroll.
Price-wise, $203.06 per person isn’t cheap, but it’s not just a guide fee. Several major sight stops are free (at least the areas visited on this route), and the tour includes key tastings—beer and sausage, fries, and chocolate experiences. If you were planning these on your own, you’d still pay for the guide plus at least a couple of meals, drinks, and dessert. The biggest value here is the coordination: you’re told where to go and what to notice, and you don’t waste time hunting.
Also, the tour is private to your group. That matters in a walking city. It usually means fewer distractions and more chance to ask questions when something catches your eye.
You can also read our reviews of more tours and experiences in Bruges.
Start at Markt 5 and Get Your Bearings at Belfort
Meeting at Markt 5 is a clean way to begin, because it drops you right into Bruges’ central map. From there, the first stop is the Belfort area by the Market Square.
Belfort is about more than a pretty tower. It’s Bruges showing off civic confidence—how a trading city organized itself and why the city center became the stage for power. In just about 30 minutes (including a walk around the core views), you get context that makes the rest of the route easier to read.
Then you’re in position to understand the next cluster of stops: the nearby historic buildings and the square names that keep repeating through Bruges. When you know what you’re looking at, churches and museums later won’t feel random. They’ll feel like parts of one system.
Jan Van Eyckplein and the Art of Noticing Old Bruges
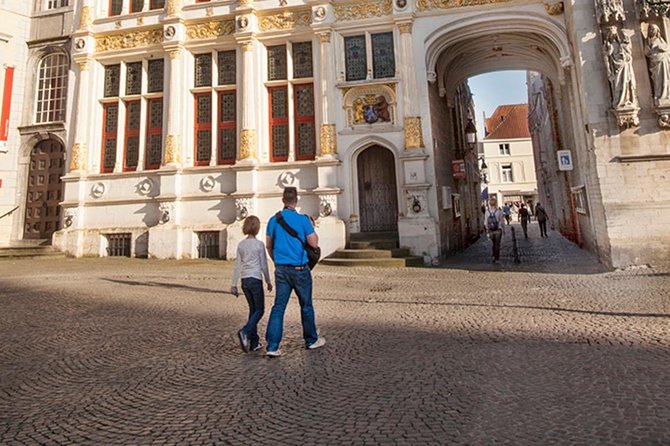
Right after Belfort, you head to Jan Van Eyckplein for a quick historical orientation—about 15 minutes. This is one of those stops that works best when you take your time just enough to notice details: building edges, street lines, and how the city spaces shift around famous names.
The payoff is mental. You start to see Bruges as a layered city rather than one postcard after another. That matters because this tour keeps moving: if you wait until later to understand the city, you’ll likely feel like you’re playing catch-up.
This stop is short, so treat it like a warm-up. Bring your attention, not your patience.
Sint-Annakerk and Adornes Domain: Quiet Stops With Big Neighborhood Clues
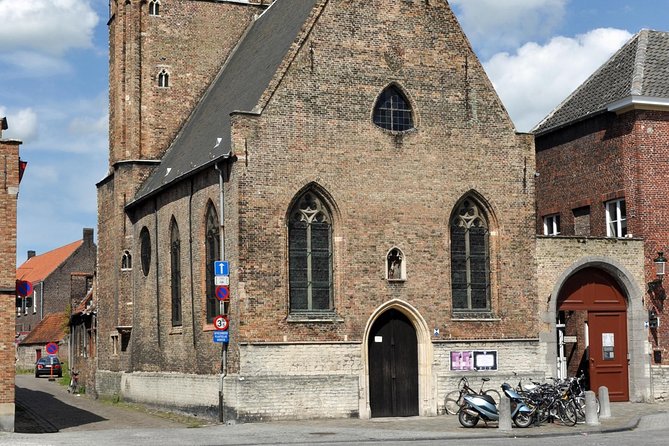
The next part leans into the city’s church-centered geography. You’ll visit Sint-Annakerk for about 30 minutes and then stop at Adornes Domain for around 10 minutes.
At Sint-Annakerk, you’re not only looking at the church itself. You’re also introduced to the surrounding neighborhood, which is where Bruges becomes more human. The goal is to see how people lived around religious landmarks, and how neighborhoods kept their identities over centuries.
Adornes Domain is shorter, but it’s a good reminder that Bruges is packed with family-linked histories. Even if you only get a brief look, the stop is useful: it shows how important “who owned what” and “who built what” is to understanding Bruges architecture.
If churches aren’t your thing, these stops may feel like a lot of listening in a short span. But if you like city context, this part is where the tour starts feeling more than a food crawl.
Burg Square and Stadhuis: Where Power Gets Painted Into Stone
Next up: Burg Square for about 20 minutes, followed by Stadhuis (city hall) for about 20 minutes.
Burg Square is often the moment when Bruges stops being scenic and starts being political. The buildings here tell you how the city organized itself and why the civic center mattered. It’s also a natural photo area: you’ll get the wider views that help connect earlier stops to later ones.
At Stadhuis, the emphasis is on heritage and the story behind the building. This is the kind of stop that makes the “history” part of the tour feel grounded. You’re not just hearing dates; you’re learning why these institutions stood where they stood.
The drawback? It can get a little crowded in the general area, especially if you’re traveling during peak hours. The tour’s pacing helps, but keep your expectations realistic: you’re in the center of a world-famous historic city.
Vismarkt and Dijver: Seeing How Daily Life Fits the Canal City
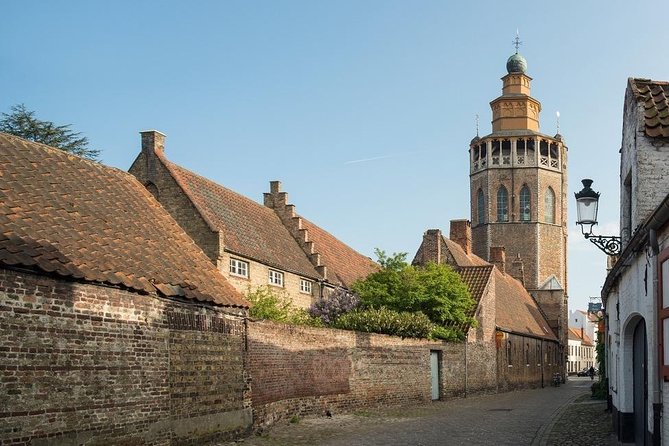
Then the tour shifts toward life-as-it-was. Vismarkt comes next for about 10 minutes, focusing on its history and habits. It’s a quick stop, but it helps explain why certain areas keep their character: trade, food, and routine aren’t afterthoughts in Bruges.
After that, you walk toward Dijver for about 10 minutes, a brief “walk on the diver” style canal-side moment. This isn’t a long break, but it’s a crucial one. Bruges without the water can feel flat; with the water, you start understanding the city’s design logic. The canal views make the whole day feel more coherent, like you’re moving through one continuous living map.
This is also where you’ll likely notice the tour’s best trick: short stops that give your brain a “window” to reset before the next tasting.
The Belleman Pub: Beer and Sausage as a Real Bruges Moment
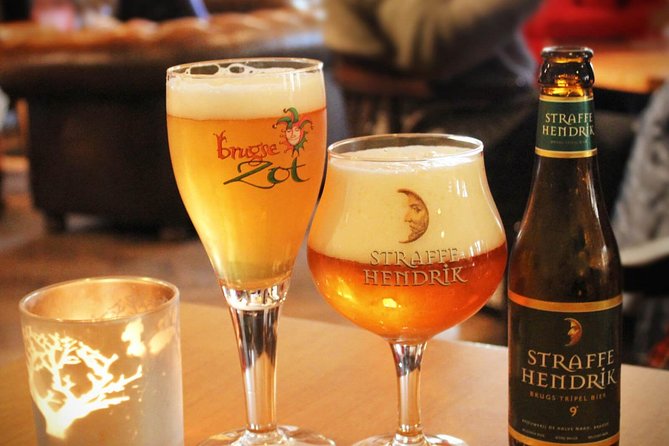
Here comes the first included food break: The Belleman Pub – Brugge, about 25 minutes, with admission included.
This stop is valuable because it’s not just a snack. It’s a local-style break that interrupts the walking rhythm. Beer and sausage fit the Bruges idea of comfort and tradition, and they’re practical fuel for the second half of the tour.
You also get a chance to slow down enough to taste, talk, and actually digest what you’ve learned. In a tour like this, that matters because the last stretch is all about sweets, and you don’t want to reach it starving or overheated.
Onze-Lieve-Vrouwekerk and Gruuthusemuseum: A Church-and-Family Story

After the pub, the route turns back to landmarks. You visit Onze-Lieve-Vrouwekerk for about 5 minutes and then Gruuthusemuseum for about 10 minutes.
Onze-Lieve-Vrouwekerk is brief here, so think of it as a “hit the landmark” moment rather than a full deep visit. In five minutes, the value comes from the introduction: you learn what to notice quickly, so your eyes know where to land.
Then Gruuthusemuseum gives you a short family-and-heritage angle. This stop helps connect Bruges’ architecture to real people, because family histories in this city aren’t just trivia—they explain why buildings look the way they do and why they were preserved.
If you love museums and want time to read every panel, the museum stop may feel short. But as part of a four-hour food-and-history mix, it gives you enough to feel informed without dragging the day longer than you planned.
Chez Vincent Fries and a Chocolate Finish You’ll Plan Around
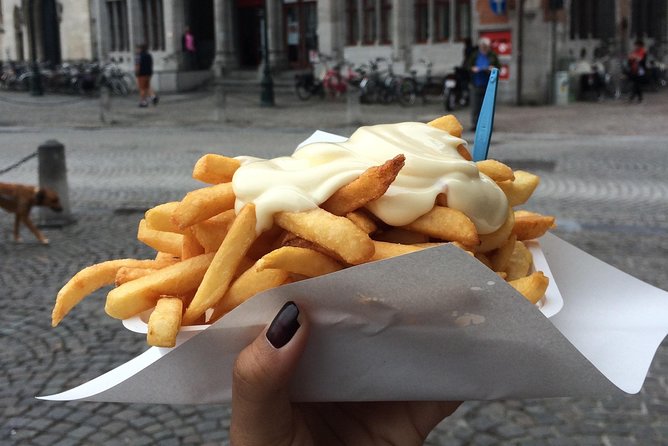
Now for the food payoff: Chez Vincent (about 20 minutes) with fries included. Reviews emphasize that these fries are a standout in Bruges.
Here’s the practical tip that can change how you eat them: your guide may recommend having the waffle without toppings because there’s sugar already in the dough. That kind of advice is exactly why a guided day beats self-guided roaming. You’ll make fewer “wrong guesses,” and the treats taste better when you follow local logic.
Next comes sweets with substance: The Chocolate Line Bruges for about 5 minutes, then Depla Chocolatier for about 10 minutes with a chocolate tasting included.
The Chocolate Line stop is a quick orientation to the shop experience—how Bruges builds its chocolate reputation and why Belgian chocolate has a worldwide pull. Depla is where you slow down. A tasting is where you learn the difference between what looks good and what actually tastes good.
Even if you only have a small appetite left, chocolate tasting at the end makes sense. The timing gives you a sweet memory to carry home, and you’re already in the right neighborhood to buy something for later if you want.
What Makes This Tour Work: Fast History, Focused Tastes, Good Flow
The best part of this experience is the match between pacing and purpose. Bruges is dense. If you try to do history plus food on your own, you either spend a long time planning, or you end up missing the context that makes it all click.
This tour does the click part for you. You learn enough at civic stops like Belfort and Stadhuis, then you get church and neighborhood context with Sint-Annakerk and Onze-Lieve-Vrouwekerk, then you understand daily-life zones at Vismarkt and Dijver, and finally you reward your feet with beer, fries, and chocolate.
Another reason it works: you’re not thrown into a single type of food stop. You get savory first, then sweets. That keeps it from turning into a sugar-only marathon, and it’s easier on your taste buds.
If you’re the type who likes asking questions, you’ll probably appreciate the guide’s style. Some guides in this experience have been known to add an extra landmark if the schedule allows, like the basilica of the Holy Blood, when guests mention it. That kind of flexibility can be a big deal in a city with so many must-sees.
Small Tradeoffs to Keep in Mind
This is not a slow-linger tour. It’s built around multiple quick stops, so you’ll need to accept that you won’t fully explore every site the way you might on your own.
Also, if your top priority is museum-level detail, you may want a follow-up day or at least a longer self-guided visit to one or two favorites from the route. The tour is designed to point you in the right direction, not replace a full day of exploring.
Finally, the experience requires good weather. Bruges is famous, but walking in the rain can turn the day from charming to annoying fast. If weather looks rough, plan a backup mindset.
Should You Book Bruges Food and History?
I’d book this if you want a high-impact Bruges day that mixes history, neighborhoods, and the tastiest stops without spending time building an itinerary. It’s especially good for first-timers who need orientation, and for food lovers who like learning the story behind what they eat.
Skip it if you hate being on a schedule, want long museum time, or prefer to wander slowly with zero structure. Bruges rewards wandering, and this tour does offer structure, so choose it if you want direction more than total freedom.
If you’re on the fence, here’s my simple test: if you’re excited by the idea of beer, fries, and chocolate in the middle of a history walk, you’ll likely have a great time. If you’re only half-interested in the food side, you may want a pure sights tour instead.
FAQ
How long is the Bruges Food and History Tour?
It lasts about 4 hours.
What language is the tour offered in?
The tour is offered in English.
Is admission included for the stops?
Most stops list free admission. Three food stops include admission: The Belleman Pub (beer and sausage), Chez Vincent (fries), and Depla Chocolatier (chocolate tasting).
What food and drink is included?
Beer and sausage are included at The Belleman Pub. Fries are included at Chez Vincent. A chocolate tasting is included at Depla Chocolatier.
Where does the tour start?
The tour starts at Markt 5, 8000 Brugge, Belgium.
Is this a private tour?
Yes. It’s a private tour/activity, so only your group participates.
What is the weather requirement and what if it’s bad?
The experience requires good weather. If it’s canceled due to poor weather, you’ll be offered a different date or a full refund.